Sorry, Iv. Can't do it. It's not that I don't love you. Cuz I do. Bunches. Oodles. To the moon and back. I just don't have the patience I was forced to have last year this time (when I had no other ideas and it was the night before Halloween party day at school). This year, I needed something, well, let's just say a little less stressful.
So I convinced her that these Rice Krispie Treat pumpkins from MakeandTakes.com would be just as cool. And they sure looked (and sounded) quite simple, yet very cute. See? How hard could this be?
So I set to work on my version yesterday afternoon (and finished them up last night), deciding to take them to school for the girls today, since we won't be here on Friday for their actual party, and I was pretty sure that the last thing I'd want to do Tuesday or Wednesday night was stay up late working in the kitchen!
A quick side note. Rice Krispie treats are interesting, aren't they? They're relatively easy to make, provided you can get over the stickiness that you have to deal with throughout the process. And the major forearm workout while mixing the cereal with the melted marshmallows. I'm a left-handed stirrer, but I must admit that multiple times through the making of my 3 batches I had to become a righty for a few swirls through the pot.
So the instructions said to make the treats per the typical recipe and then, after they cooled, form them into pumpkin shapes (balls). Sounded pretty easy... But after getting them into the pan, I got eager and thought to myself, "Heck, forming them into a ball should be easier when they're still warm, right?". Wrong. Well, at least partially wrong. It WAS easier to get them into a ball at this point (provided you use my mom's trick and wet your hands to fight off the stickiness), but getting it to STAY in a ball proved impossible, and the candy corn eyes/nose and green Mike-and-Ike stem ultimately fell into a big blog of orange sticky mess.
Pumpkin #1 = trash can
So I decided that maybe the lady (I assume?) that wrote the instructions actually did know better than me as to how this process should work. So I put the pan in the fridge to speed up the cooling process. I mean, the girls were napping, so it's not like I had all day to wait it out!
I'll make a long story short, since I doubt you're being too entertained by my step-by-step detailing of the pumpkin-making process.
Suffice it to say that my version didn't turn out nearly as good as the one pictured above. I DO like how mine are much more orange than the model. I do NOT, however, understand how MakeandTakes.com maintained the look of the Rice Krispies and still was able to form them into a perfect ball (although now that I think about it, I bet they didn't use as many marshmallows!). Mine, as you'll see, were slightly elongated. When offering up his unsolicited opinion, Dale described them as "corn cob pumpkins".
Whatever, Dale. I didn't see YOU braving the sticky mess to give it a shot! (He's not reading anymore by this point, anyway, so it's okay for me to rat him out like that. Although, just in case he IS reading, I will say that Brooke and I truly appreciate him offering to give all 3 girls a bath so that we could finish up the pumpkins before the kids' bedtime!)
I mention Brooke for a reason. She was actually able to make a few round pumpkins when she and Emerson stopped over to see my progress. So I guess it's just me that had a hard time with it.
To show you what I mean... Here's a sample of one of MY pumpkins.

And here's a sample of one of Brooke's.

I know. I'm not as crafty. This is not a newsflash to anyone that knows both of us!
But, moving on, I was able to successfully create 30 pumpkins for the girls to take to school today. And you know what? They both thought they were just GREAT. Which is all that matters, right? Well, that and the fact that I convinced myself to buy the 5-pound bag of Mike-and-Ikes at Sam's Club yesterday, since I was going to need "a lot" of green ones to make the stems. So I can now snack on them for like the next year or so. That's a pretty big positive, too!


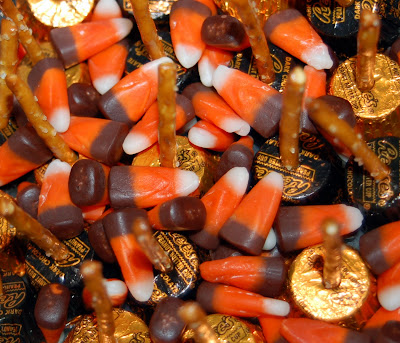
Oh, and before I sign off on my Halloween treats for 2010, I can't forget to share pictures of what I'm deeming the BEST HALLOWEEN TREAT EVER. Solely because it took me about 4 minutes to make over 40 of them. At that speed, it doesn't even matter if it ends up tasting good! But you can take one look at this one and know that taste will not be a problem...

It's a witch's broom! See it?
Instructions to prepare: Buy mini Reese's Cups. They even have them with Halloween-colored wrappers. Start a hole in the top with a toothpick. Then stick in a pretzel stick (but be careful not to stick it all the way through the other side!). Throw them in a bowl with a bunch of candy corn spread around them and you've got an adorable no-more-than-5-minutes-of-prep snack. If you're having a Halloween party, you can take the wrappers off before making them. If you're taking them somewhere (like we did to school), just leave the wrappers on. Love it!

Happy Halloween snacking, everyone!


No comments:
Post a Comment